

The character was all ready to animate but the project stalled due to a lack of inspiration script-wise on my part and a need to spend more time learning to use CTA Pro.
Fast Forward to December 2013 and my purchase of Crazy Talk Animator 2 (Pipeline edition). After spending a few weeks over Christmas and New Years learning CTA2 I decided to revisit Cool Froyd and discovered that enough of what I had learned was transferable to CTA Pro. What's more learning CTA2 made Pro look almost like child's play.
In the space of an evening I had ad-libbed a short animation, created with CTA Pro, featuring Cool Froyd, for my previous blog post about AVSoft's Voice Changer Software. I was really happy with the result but not the script and I also knew CTA Pro characters can be imported into CTA2.
So, back story over, let's finally continue animating Froyd, this time in CTA 2. I won't go through the process of importing CTA Pro character because there really isn't much to it. Once I had Cool Froyd set up in a new project with his blue backdrop it was time to start animating.
Quick side note about my script... I decided it was time to stop waiting for inspiration and just choose a topic for Froyd and write a short two minute piece. It's not the funniest script you'll ever hear but it beats shelving the project entirely while waiting for genius to hit.
The first thing to notice about Froyd is that he's not a standard humanoid character. Which means all of the predefined motions for human characters available in CTA 2 are virtually useless. However CTA 2 allows you to operate your character just like a puppet, in real time. Not only that but you can isolate different parts of the character and just operate those. This allows you to build up complex movements in sections at a time.
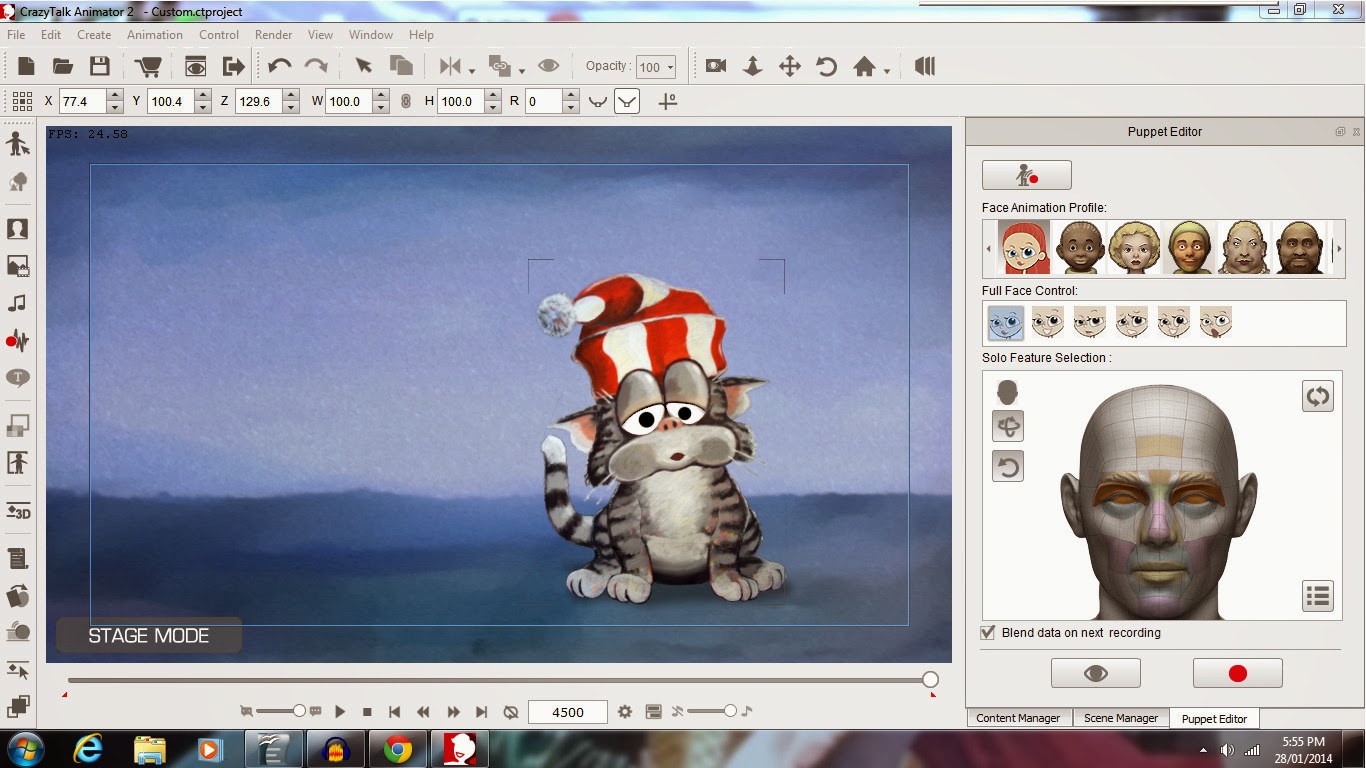 |
| Crazy Talk Animator 2's Facial Puppet Editor. |
My process for animating Froyd was to add the voice track on the first pass. CTA 2 has automatic lip syncing so importing the voice file was as complex as this gets. You can fine tune the lip syncing if the auto sync doesn't quite get the match right but I didn't for this project.
Next I did a pass of random eye blinks using the facial puppet editor. I could have done these at any time whilst puppeting the face but doing them now means one less thing to think about.
Most of Froyd's head was animated using the body puppet editor. This simply involves choosing a setting, say side to side head tilts, doing a test run and practicing with the mouse (or track pad in my case) the movements you want to make simply by moving the mouse around in real time.
Once you've rehearsed the movement you simply hit the record button and repeat your movements. If you don't like the result you can always hit undo. The upside is that puppeteering the character is so much quicker and more intuitive than creating key frames.
The only parts of Froyd not animated with the puppet editors in real time is his tail - which is a looped setting that sways the tail from side to side. The pom-pom on his hat - which I key framed entirely on the timeline and his praying hand gesture - which was also key framed on the timeline.
Camera control is handled by creating key frames on the timeline. I used two basic shots, a wide shot and a head shot with a slow pan in at the beginning and a slow pan out at the end.
Usually you would create titles and end credits in your video editing software but since Cool Froyd is a one scene animation I decided to create the opening title and closing credits using the effects features available. That black title screen is just a black rectangle prop in front of the camera that becomes transparent or opaque as needed using the Opacity function.
Finally I added a bit of music for the intro and decided that was it.
Below is the final two and half minute short created entirely with CTA 2. There's plenty I could do to improve it but I didn't want to get bogged down with striving for perfection. This film's main purpose was to help me learn the software. I think it's done that rather well.
Most of Froyd's head was animated using the body puppet editor. This simply involves choosing a setting, say side to side head tilts, doing a test run and practicing with the mouse (or track pad in my case) the movements you want to make simply by moving the mouse around in real time.
Once you've rehearsed the movement you simply hit the record button and repeat your movements. If you don't like the result you can always hit undo. The upside is that puppeteering the character is so much quicker and more intuitive than creating key frames.
The only parts of Froyd not animated with the puppet editors in real time is his tail - which is a looped setting that sways the tail from side to side. The pom-pom on his hat - which I key framed entirely on the timeline and his praying hand gesture - which was also key framed on the timeline.
Camera control is handled by creating key frames on the timeline. I used two basic shots, a wide shot and a head shot with a slow pan in at the beginning and a slow pan out at the end.
 |
| Adding Camera key frames on the timeline. |
Finally I added a bit of music for the intro and decided that was it.
Below is the final two and half minute short created entirely with CTA 2. There's plenty I could do to improve it but I didn't want to get bogged down with striving for perfection. This film's main purpose was to help me learn the software. I think it's done that rather well.
Overall I'm happy with the result. I've still got to learn how to get more facial expression into the character. I also had some trouble with stretch and squash puppeteering being wiped by the tilt head from side to side puppeteering. Hence there's no stretch and squash of the head like there was in my voice changer animation.
My next step will be to create a G2 character in CTA 2 - which is a character that can be viewed through 360 degrees of angles. Froyd is a G1 character and only has the one front view. It would be quite hard to make multiple views of Froyd since his original source image was a painting.
I hope you've enjoyed reading about Froyd. I may make more episodes once I've acquired a little more proficiency with the software. For now, it's just been great to see a painting come to life.
Comments
Post a Comment
This blog is monitored by a real human. Generic or unrelated spam comments with links to sites of dubious relativity may be DELETED.
I welcome, read, and respond to genuine comments relating to each post. If your comment isn't that save me some time by not posting it.