
The Lazy Animator Versus Garry Pye - Comparing Character Animation Workflow in Cartoon Animator

The Lazy Animator and Garry Pye's Jane Danger.

Before you get all excited and start yelling 'Fight! Fight!' that's not what's happening here. There is no long running feud coming to a head at this moment with an 'Animation-off' (if that's even a thing?).

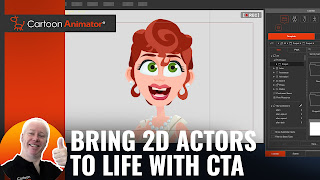
Garry Pye, Cartoon Animator Content Legend, and Reallusion's 2D Community Manager, recorded an excellent hour long webinar (excluding question time) called, Bring 2D Characters to Life with Cartoon Animator where he demonstrates how he goes about detail animating character faces for more dynamic performance.

Garry Pye's Bring 2D Characters to Life with Cartoon Animator Webinar.
Click to go to Garry's Webinar replay.
His demo animation, featuring his character, Jane Danger, showcases how he uses many Cartoon Animator features to breathe life into a 2D animated character.

What you'll notice from Garry's webinar is that he manually key frames almost everything. He doesn't even use Cartoon Animator's automatic lip syncing feature for close up animation.

Garry makes multiple passes through his animation's timeline, manually key framing the mouth, eyes, eye brows, pupils, mouth and face transformations and deformations, and even utilizing subtle full form deformation (FFD). He also manually key frames subtle shoulder movements.

There's nothing wrong with any of his process and the results speak for themselves. 

The Lazy Animator Workflow

However... Cartoon Animator has a bunch of time saving features Garry doesn't use a whole lot because, well, he's Garry... and Garry loves manual key framing and specifically having that level of control over his animation.

As someone who has adopted the name 'The Lazy Animator' the faster I can animate anything so it still looks at least somewhat competent the better!

For my own personal interest I decided to recreate Garry's demonstration project but animating it using my workflow. Note that the point isn't to recreate Garry's animation exactly. It is to compare the results between our two workflows.

Watch my video below. Inset is Garry's video so you can compare. There's no debate about which method produces the best results, it's Garry's all the way. However if you don't find manual key framing therapeutic, like Garry, you do have other workflow options within Cartoon Animator.

Breaking Down My Process

Editing the Viseme Mouth shapes in Cartoon Animator 5.
Once the auto lip sync is done I go through and manually
switch any Viseme mouth shapes that don't look right.
My set up is the same. Place the character and add the voice, however I do use the auto lip sync, even for close up character work. Broad strokes, it's usually pretty good. However, as Garry says, for close up work its failings do become more noticeable. 

It's still a real timesaver only manually fixing any part of the lip sync that doesn't quite match. I stick to the standard set of Viseme mouth shapes the system uses and don't use any additional mouth sprites added to the character at this point.

Next I do the body movement by finding one or two premade talk or idle motions I can apply to the timeline. Again a big timesaver. I'll fill the entire timeline with pre-made motion (stretching, looping, and even cutting and deleting sections of the motions as needed). 

On a close up shot like this I'll remove any animation that lifts the arms and hands onto the visible screen area, and I'll remove all the leg motions if the character is moving side to side too much. Beyond that I'm not too fussy about how well the body movement matches with what the character is saying. So long as it doesn't look totally out of place.

Adding expressions to the character's face using the Face Key Editor in Cartoon Animator.
Using the Face Key Editor I'll manually key frame
all my character's facial expressions from templates.
Note that this screen shot was taken after I did all my
puppet animation which is why you can see so
many key frames.
Using the Face Key Editor, on the Templates tab, I'll go through and match facial expressions to what is being said as best I can. The actual descriptions of the face templates are just a guide. Some expressions will actually fit with more than just the emotion they're grouped under. 

This is as close to manually keyframing I get but because the templates change a character's entire expression I save time not key framing individual items like eyebrows.

My final pass is to open the face puppet editor, select the eyeballs, head turn and rotation icons, then I do a quick record pass to bob the head around a little, move the iris', and add eye blinks (by clicking the left mouse button randomly, when I feel there should be an eye blink). 

I find this is the fastest way to do eye blinks. In Garry's process he gives some pointers about when to manually key frame eye blinks. Advice that I've followed on occasion in specific circumstances. Most of the time the viewer will only notice if your character never blinks, or blinks too much. So long as you have a few blinks, even double blinks, every now and then with some pupil movement, your character will look alive.

On this specific project I did one more pass to replace some of the mouth sprites with more expressive, non-Viseme mouth selections, just at the extreme points of the emotions mentioned in the dialogue. For example I added a much wider smile sprite when 'happy' is mentioned. I also tried to follow Garry's camera movement as well.

All in all I would say I spent around an hour and a half animating the character. The two longest tasks were correcting the Viseme mouth shapes, and adding the face template expressions - both manual key frame work.

Which Way Should You Work?

My workflow method is geared toward beginners looking for quick wins and people who are less concerned with the finer details of character animation.

Personally I find Garry's process too time consuming despite understanding that the more you manually key frame the faster and better you'll get. The same could be said for my workflow.

Then I asked Garry roughly how long it took him just to animate his project? He initially estimated an hour and a half, then he contacted me later with a revised estimate of an hour...

I know what you're thinking... I just said I took an hour and a half on my project using all these timesaving features of Cartoon Animator?

What can I say? Garry practices manual key framing a lot (I guess) to be that quick. For me, I can't stand manual key framing. The more I do it, the longer the breaks get between the next section of key framing, to the point I may not even finish my project. Just correcting the auto lip sync Viseme's on this project was a chore to me.

That said Garry's manual key framing approach gives you the most amount of control over how your character moves. If that's a priority for you, lean towards his workflow.

If less detail animation with good enough results is acceptable then start with my workflow and who knows, maybe you'll find yourself manually key framing more and more over time.

Comments

Popular posts from this blog

Inochi2D - Free Open Source 2D VTuber Avatar Rigging and Puppeteering Software (Part 1)

Inochi2D Creator - Free Open Source VTuber Software. If you've been looking for a way to live perform as a 2D cartoon avatar on camera, whether it be for a live stream or for pre-recorded content like educational videos, then VTuber software is a low cost (or even no cost) option worth looking into. In my previous post, How to Become a VTuber - 2D and 3D Software for Creating and Controlling Your Avatar , I took a brief look at the relatively new but completely free and open source Inochi2D  which I thought showed great potential for my own needs of creating a live performance character rig for my own TET Avatar that I use for all my promotional materials. While it is possible to live perform my character using Cartoon Animator itself, Reallusion's MotionLive2D capture system isn't great - with lip sync in particular. More importantly though, I can't exactly teach people how to use Cartoon Animator if I'm using Cartoon Animator to control my Avatar. What is Inochi2D

Wonder Unit Storyboarder - Free Storyboarding Software for People Who Can (or Can't) Draw

Wonder Unit Storyboarder.  As an independent and solo animator I'm always tempted to try and skip storyboarding my animated shorts because they're usually only single scene sketch comedy type jokes. As a result I have many unfinished projects that kind of petered out due to having no clear finishing line. Storyboarding your productions, no matter how small, gives you a step by step guide of every shot that needs to be completed (no planning shots as you animate). It also allows you to create an animatic that gives you a rough preview of the finished production. In short, you shouldn't skip storyboards as they, generally, increase the chance of the project being completed. Disclaimer - I'm Not a Fan of Storyboarder Upfront, Wonder Unit's Storyboarder  is not my preferred storyboarding software. However it's completely free, has a number of very compelling featu

Glif (Alpha) - Make Your Own Tiny AI Powered Niche Image Generator Apps

I  first heard about Glif through a YouTube video that mentioned you could get access to Flux Pro (the latest 'game changer AI' generative image model) through the site for free. While I had a vague notion from the video of what Glif was, I wasn't expecting it to be so easy to get started with, and so good with my very first results. Glif is an easy to use, low-code platform for creating tiny AI-powered generators called Glifs. While that may not sound inspiring, what Glifs allow you to do is create a tiny app that niches down to a specific type of AI generation that the user modifies with their own inputs. The best way to really understand is with an example.  My First Glif I've recently been using VivaGo's AI platform  (free and unlimited at the time of writing) to consistently generate full body characters in a front facing T-Pose that I can rig as front facing characters in Cartoon Animator. Unfortunately it can be a bit hit or miss maintaining the T-Pose part

Krita AI Diffusion - Generative Image AI For Krita is Seriously Useful, Powerful and Free (If You Can Install it Locally)

Generative AI sequence of a woman in a business suit. From sketch to refined image using Krita AI Diffusion - by TET G enerative image AI, where you describe an image with a text prompt to an Artificial Intelligence model and it produces a new image based on your prompt, is gaining a strong hold as a tool for many artists. Krita AI Diffusion brings generative AI image tools right into your favourite free and opensource, graphics editor, Krita. Not only that, if you have a computer with decent specs (and at least 10GB of hard drive space), Krita AI Diffusion is completely free. What If I Don't Have a Powerful Computer? If you're in my situation, with a computer that was around before anyone in the mainstream had even heard of generative AI, you can still access Krita AI Diffusion for free, using a cloud based AI server, Interstice  and 300 tokens, to get you started. Once your initial tokens run out, purchase 5000 more for 10€ (approx US$11.00). Tokens never expire. I would

Zack in Time - Support an Independent 2D Animated Series that is Creating Opportunities for New Talent

Z ack in Time is an independent, 2D animated series about a biracial 13-year-old  teen, who has trouble fitting in at his new school, until he finds a time-traveling watch developed by a secret government agency.  Created by Christian Haynes, who I featured in December of 2021 , and produced by Imhapie , the production has now launched a Kickstarter  (which runs until October 25th, 2024) to fund the development of the series pilot episode, as well as a full series, which is ready to produce. Why You Should Support Zack in Time Zack In Time is more than just another 2D animated series hoping to be successful, and is worth your consideration on two levels. Not only does the series hope to tell a fun and authentic story, showcasing unique characters but also, behind the scenes, the producers hope it continues to be a launching pad for young artists' careers.  A Relatable Story that Promotes Diversity and Representation The story of Zack in Time reflects the struggle that we all feel a

The Ultimate Independent Animator's App and Resource List - Animation and Video Life

Image created with Cartoon Animator 4. Being an independent animator is not like a studio animation job. There's so much more to do that is indirectly related to the actual task of animating. Over the years I've sought out many apps, tools, and services that can help me achieve that one single task, expressing myself through animation. Below is my Ultimate Independent Animator's Resource List for 2024 (last updated Oct 2024). It started out as a list of free or low cost apps that could help you in every stage of producing either 2D or 3D animation, and then just kind of grew from there. You may not have been looking for a Time Management App as much as you needed something to get you started in 3D animation but when those commissioned projects start coming in you'll have a head start on maximizing your time. All the apps and services on this list had to meet two main criteria: They had to be useful and relevant to an Indy Animator/artist. The base app/se

Using Avatar Maker with Cartoon Animator - Free Vector Cartoon Avatar Creator with Four Art Styles

I'm always on the lookout for cartoon avatar makers of any kind, whether it be ones that 'cartoonify' your photo, or ones that let you build a cartoon likeness from a library of individual features.  Free Avatar Maker  falls into the latter category and can be used for making head and shoulder cartoon avatars. While it doesn't have an extensive library of character features (you may struggle to get a good likeness), uniquely it will make your avatar in four different art styles concurrently, allowing you to save the one you like most, or even all four.  I wasn't overly impressed how my TET avatar looked in the first two styles, but style three is quite possibly the coolest looking version of my avatar I've ever seen in a third party avatar creator. It's a very contemporary style. Style four, line art, is also not too bad. Avatar Maker's User Interface. Switch between the four different art styles shown across the top at any time. I particularly like the