
 |
| Replica A.I. Voices are great for in game character voices. |
I first trialed Replica Studios A.I. Voice Actor Text To Speech (TTS) voices shortly after they launched about a year ago and was suitably impressed by how natural they sounded. Some voices better than others but most sounding very close to human with the right inflections at the appropriate moments. Since then they have been working on improvements and adding more voices to their voice cast library.
I have used Replica Studios on projects in the past, most notably on my 2021 Reallusion, Lip Sync Contest entry featuring my character, Bat Storm.
 |
| Mia and the Tourist. |
This time I've decided to use Replica to cast the other two voices in my upcoming Mia and the Tourist animated short that I've been blogging the process of creating through demonstrating the apps I'm using to make it.
So far I've covered scriptwriting, storyboarding, background creation, and character rigging.
When I say the other two voices I'm referring to Mia and the Car Rental Manager (see my post on scriptwriting if you want more details of this animated short). The Tourist is loosely based on myself so I typically use my normal speaking voice for this character.
Generating Replica Voices
Replica itself is a desktop app that connects to their server. Once installed and logged in you can begin creating voices right away. If you're using iClone, Unreal Engine or Unity there are integrations available that let you use Replica directly from those apps.
Initially you start with 30 minutes of free credit and you can buy more from the app as needed. You can also earn credit by referring friends to the app with your unique link (as I've done with my link at the beginning of this article).
There are two ways to proceed in the app, the Sandbox, where you can generate individuals lines of dialogue and download as needed, or Projects, where you can enter an entire script worth of dialogue and download all at once. Unlike the Sandbox you can save multiple projects here too.
The Sandbox
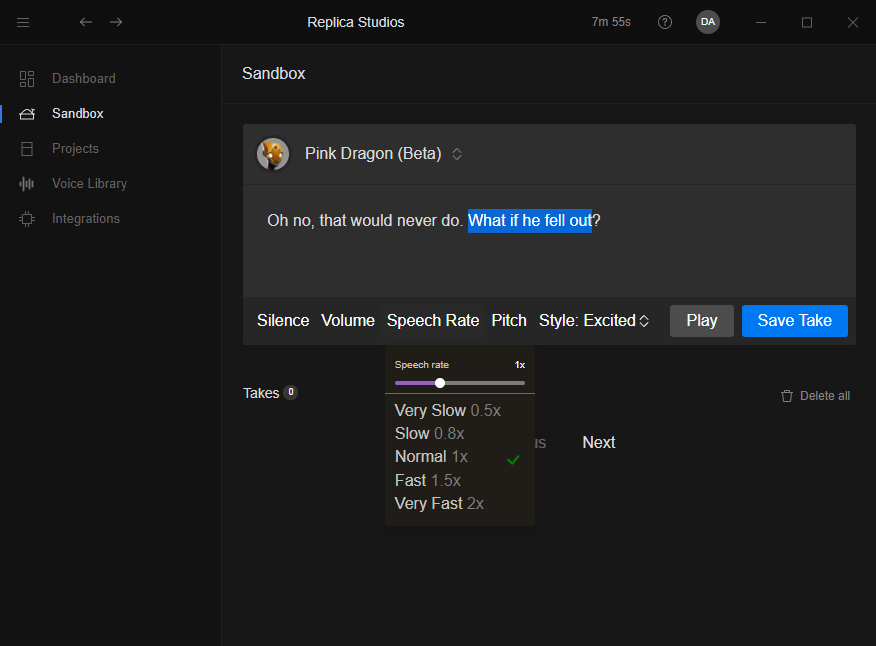 |
| Replica Studio's Sandbox interface. Change attributes like Speech Rate, Pitch, and the Style. |
The Sandbox is about as simple as it gets. Select a voice, type your dialogue, click Play to preview. Select any part of the text to make further adjustments like adding silence, volume, or changing the speech rate, pitch, or style (when options are available).
Saving a take will count towards your time credit so it's best to save only those takes you intend to download.
The sandbox will let you save takes with different character voices and dialogue so it is possible to generate all the voices you might need for a short project here.
When you have all your takes just download each individually with their download button.
Projects
 |
| Replica Projects Section helps keep your script organised and easy to enter. |
The Project section is a new addition to the app since I first reviewed it. At the individual line level it works the same as the sandbox but above that it allows you to pick your character voices and assign them to characters in your script. You can then enter your script broken up into its scenes.
The interface for entering dialogue is more of a list so you can work quickly, see an overview of key settings and make changes to text and character voices without having to get down to individual line level (you only need to go that deep if you want to play around with volume, speech rate, and pitch on individual words and phrases).
Just aware that if you preview the same line of dialogue multiple times it does start using up your credit. So keep an eye on this if your credit is running low.
Other useful features include the ability to move lines of dialogue around, and you can preview an entire scene with the play button at the bottom of the scene window.
Once you have all your dialogue entered you can download each line individually (which is more useful if you want to change a line of dialogue later) or download an entire scene at a time as a zip file in WAV, MP3, OGG, and FLAC formats. Each audio file is named after the line number in the scene.
Replica's Voice Library
New voices are being added to Replica all the time. You can browse the library and check out each voice with the pre-recorded samples just by going to the voice library section of the app. However it's actually easier to browse from the sandbox where, when you go to select a voice, you can filter the available voices with search options like Gender, Age, and Accent etc.
Like any Text To Speech system there will always be some voices better than others. Personally I think Replica still has some way to go before their voices will pass as human in every situation but many of them are good enough to use in situations that don't involve too many emotional extremes.
Adding the Voices to my Storyboard Animatic
As mentioned earlier I used Replica to voice two of my characters. The third is being voiced by me.
I recorded my lines using Audacity. I won't be covering that as part of this series but if you do want to get some insight into how I batch export my dialogue from Audacity into individual audio files for each line of dialogue check out my article, A Better Way to Export Clips From a Single Audio Dialogue Track in Audacity
For the purpose of letting you hear my generated Replica voices I imported my audio into Storyboarder and exported an animatic of my rough sketches (below). I wouldn't usually do this. Normally I'd make an animatic using my characters and sets in Cartoon Animator but now, having seen this, I'm glad I did.
Comments
Post a Comment
This blog is monitored by a real human. Generic or unrelated spam comments with links to sites of dubious relativity may be DELETED.
I welcome, read, and respond to genuine comments relating to each post. If your comment isn't that save me some time by not posting it.